Tuesday, October 22, 2013

Clyde James

9.28.2013


7 lbs 12 oz & 20 inches

Saturday, July 27, 2013

Dress for Ila

David told me that Ila's sunday dress was getting too tight, so I decided in my last week of having a sewing machine (before being packed) that instead of making a dress for myself I would make one for Ila. I used some of the pattern pieces from the junebug dress pattern (size 2T)--specifically the sleeves and the back pieces. I used the back pieces for both the front and back of the bodice, but I added an extra 1.5 inches and cut through the fold for the back part so I could add buttons. It was my first time trying to do buttonholes, and let me tell you it was horrifying. The fabric was too thick to work with regular settings. It looks totally awful up close..but nobody is looking except me hopefully:)

I used some knit fabric I already had. You may recognize the skirt fabric from here.  The buttons I found in my grandmothers button collection. They are bright orange with little mushrooms, and so cute! I used my new shirring knowledge to do the puffed sleeve. I zigzagged the edge of the sleeve and then did one line of shirring near the edge. Then I sewed the sleeve ends together, added a gather on the top, and attached it to the bodice. I also had some lace lying around from an etsy purchase awhile back I wanted to add, so sewed that on last using a straight machine stitch (and going very slow, using the hand wheel for a lot of it).

Anyway. The sewing machine is now packed so no more projects for a while. I'm not sure if the sewing fever will last, but it has been fun while I had it.

 This picture of Ila in it is before I added the lace.


Trying to show the cute buttons, but the lighting is terrible. Alas.

The end.

Rie Top -- Megan Nielsen

This review is for pattern MN1005 from the maternity survival pack, by Megan Nielsen.


This was the first top I made from the pattern pack I ordered. I used medium weight jersey and it turned out very well, if a bit long. I hated it the first day, until I decided that adding a belt would make it look much nicer and I wouldn't feel like I was wearing a shapeless pillowcase. I made the belt by buying some red knit elastic and a buckle from Joann fabrics. I just custom fit it to my rib cage and sewed the elastic over onto itself after looping through the buckle. I do find it too hot to wear in warm weather because of the long sleeves and thick fabric. I would make this again using something more lightweight (but opaque) or shorten the sleeves. I think it will always need a belt of some kind though to add shape.


Tuesday, July 23, 2013

Play Mat

Another project I did in June is this play mat. I got the front fabric on etsy. The back fabric is from fabric.com, and the middle layer is some Quilters Dream batting (here). I discovered that my grandmothers sewing machine closet (which I inherited and adore) not only has a collection of tons of random buttons, thread, zippers, bias tape, etc, but it also has every presser foot accessory I know of (which isn't really saying a lot..but it also had a lot I don't know of too!). One of which is an even feed / walking foot which is super helpful for machine quilting.

I used safety pins to baste the layers together (after prewashing the the outer layers. The batting layer instructions said not to prewash. I forget why). Then I used the walking foot to sew along the edges of the roads and the airport landing strip. It didn't do a perfect job, (there is a bit of pucker in some spots) but we'll just blame that on my minimal basting and not my grandmothers awesome machine! I used biased tape to finish the edges. I realized that I should have purchased regular width double biased tape instead of quilting biased tape because the tape was wider than I needed. I think the quilting tape is for super fat quilts. Mine was not fat. But other than that, this was great!

Now Ila can play on it with her cars. Or she will someday anyway.


Diaper Cover / Wool Soaker

A few months ago, I was putting a Disana wool cover over Ila at night since she was peeing through her diapers every night. (this is left from my cloth diapering days, before Ila began peeing more than I could handle and resulted in me putting her in disposables). I decided I needed another cover while the other one gets washed, and thought I could try my hand at making one.

I learned to crochet only last April. I have made half of an afghan, but then switched to making this cover. Then I never went back to the afghan because I started the sewing madness. I had a tragic moment while making this cover when I realized I'd done it all in the wrong stitch (one which turned out not even to have a name!) and was not loose enough. So I unraveled it all. Sadness was had that day. But I got over it and finished the soaker. I used this tutorial. And I put it on ravelry! I never knew about that website until I learned to crochet. I called my mom and asked her to decode some instructions on the phone and she was so helpful! Even just sort of describing my problem and she knew how to fix it. Way to go mom!


The silly thing is that by the time I finished this, (end of June), it was SO unbearably hot that we stopped using the wool soaker. THis also coincided with the realization that the soaker wasn't quite as needed anymore. Ever since my friend Libby suggested I use size 5 diapers at night, most of the leaks stopped. Ila wears size 3 during the day. I'd tried size 4 at night and it hadn't stopped leaks, but for some reason trying size 5 never occurred to me. So thanks Libby! You saved our sheets:)

At least I have an extra soaker now. Unfortunately I never really got to test it and see if it stops leaks as well as the Disana one. The weave is much looser, but I lanolized them the same way and they are both 100% wool, so theoretically it should work:) I guess I'll find out on fire hydrant (baby #2!)

Refashion Swap Shirred Maternity Shirt

This is the second shirred top I made from a men's shirt (the first is here). I followed this tutorial.


This was pretty time consuming. I love the final result though, and I learned a lot. I started with a short sleeved men's shirt with an 18 inch neck. It was very billowy. I chose it pretending I was huge and I'm glad I got it so big. (Because lets face it, I get big!) The color was totally coincidental--I didn't choose orange to match the tutorial. I chose it because I like orange!

The tutorial is missing steps on how to do the collar so I had to make up a lot for this shirt. For example, this shirt did have a yoke at the top back with the little pleat at the center which many men's shirts have. The top of the back of my remade shirt begins just below the yoke, which I unpicked and removed partially. So the shirring goes across the extra fabric from the unpicked pleats. Also, I didn't even try and replicate what she did with the collar on the tutorial. I don't know where she got the fabric, and I don't know how to make collars so didn't know how to start. I ended up just making a simple bias tape kind of collar over the raw edge of the cut neckline. It is a little wonky in the back from the shirring, but looks well enough.

I did the shirred back first, then the pintucks in the front. I don't know how the girl in the tutorial did pintucks first and magically guessed the right number to do so it matched the shirred shoulders in the back. I tried this shirt on a lot while making it. I had to lengthen the pintucks and add a couple inches more of shirring in the back as the last step of the shirt because it was all too short looking Also, I did not change the men's shirt sleeve except to taper the underarm seam. I added a hook and eye in between a couple of the buttons too since it pulled across the chest.


Maternity Skirt

I did not follow a tutorial on this one, but I used some of the ideas I garnered from my first project for it. I made this last April (but the picture of me is from July). This fabric is ITY jersey knit, which turned out to be very lightweight but also very cool (and not see-through! woo!) so it has been great for summer. It was tricky to sew with. I had to use a straight stitch presser foot so the fabric would stay put for stitching (less room to flap around with that foot), and also had to adjust thread tension which I can usually ignore. Also definitely used a stretch needle for light fabric.


Striped Knit Maternity Dress

This was the very first maternity thing I made this pregnancy (early april). It is sitting back on my sewing machine table, waiting to either have the sleeves let out or to remake the fabric into something else. I did not like the look of it much. I guess sewing has a learning curve, and this was my first project after years of doing zero sewing at all (and I was never much good to begin with).

I was trying to follow this tutorial, which looks really cute but mine did not turn out. I didn't have enough fabric for it, and so the skirt is too clingy and the sleeves are too tight. Also the material is too see-through when pulled tight (it was a smocked fabric I got online). Buying fabric online is often hit and miss, but Joanns just does not have any sort of selection of knits. They are all solid interlock jersey from what I saw. There is a small knitting & fabric store in Provo called Harmony which does carry a few knit fabrics, (one of which I bought for the Rie Top which I will post soon), but they are so expensive that ordering online is just so much cheaper.


Full Panel Maternity Pants

I wanted to make some full panel maternity pants based on this tutorial. It was a trial and error process, but the finished product looks like this:

 This is one of the earliest projects I did (early may). These pants sort of work, but are not very practical because the panel fabric I chose was interlock jersey which only has 4 or 5% spandex (not nearly enough!) and the fabric doesn't rebound. The maternity panels I've seen in stores have something much higher, like 18 or 20%. The fabric just gets stretched out and doesn't spring back. So then the pants end up falling down when walking, which is the problem I had with below belly elastic maternity pants. But they are very comfortable for sitting, which the low cut pants are NOT. So. I guess I'll wear skirts if I want to walk very much, or I'll wear my pair of store bought ones.

Ruched Maternity Skirt - Megan Nielsen

This review is for pattern MN1008 from the maternity survival pack, by Megan Nielsen.

I had some serious problems with this skirt. I made the correct size based on my hip measurement (XL). But the skirt was SO BEYOND TIGHT that I tried letting out the seams. That was no where near enough, so then added 3 inch strips of fabric to each side. Then I decided it was too short, so I added a ruffle. I really love how it turned out, but I had to unpick that thing SO many times it was beyond irritating. I used 40% stretch fabric just as recommended but was really tight, so if you are making this skirt then be prepared for something to go wrong if you are the type to get big. I'm only 27 weeks or so in this picture. 


Unpicking zigzag stitches is such a pain. I made notes for next time to only baste the skirt together before doing zigzag stitches on the sides so I could try it on and have an easy time unpicking if necessary. Also I made notes to add an extra 3 inches to each piece when I cut it out next time. I did make another skirt, which came together much quicker. To get the extra 3 inches, I pinned the pattern for front and back 1.5 inches away from the fold. That way I kept the same side shape and added an extra 3 inches down the front and back center. This next one I added extra length too--as much as the yard of fabric allowed. 


I left the ruching off both skirts. I was worried it would make it tighter than I wanted, but I also had the issue of where to put the elastic on the purple one because I added extra side panels. The tulip one I may add the ruching elastic later, or for another pregnancy. I plan to use clear elastic for the ruched sides (as I did in the ruched maternity shirt) since it is so stretchy. 

Wrapped Maternity Top - Megan Neilsen

This review is for pattern MN1003 from the maternity survival pack, by Megan Nielsen.


I like this top. But it is very hot. And it is really annoying wrapping all those layers. It is not very practical for a pregnant woman who has to undo it for every bathroom visit (which for me means a lot!), and then redo it after. So I like it in theory, and I'm sure I'll wear it when it isn't so flipping hot, but I think it is more of a winter top.

Ruched Maternity Shirt - Megan Nielsen

This is enough evidence to put me over the top. I am beyond domestic. My own siblings do not know me. I am a strange visitor who sweats a lot.

I bought a 4-pack of patterns a few months ago in order to make some maternity clothes. From Megan Nielsen patterns http://megannielsen.com/collections/all-products/products/maternity-survival-pack. This review is for the ruched maternity shirt, MN1006.

(picture taken 2 months ago)

This pattern turned out well, but the fabric I ordered from fabric.com turned out to be way sheer. I read on the diymaternity.com site (also run by Megan Nielsen) that her go-to fabric is this bamboo jersey stuff, but I ordered it and it was so sheer I thought I needed to wear a tank top under the shirt. So that's what I'm wearing in the picture. The fabric was also very thin and difficult to use a twin needle on, so the neckline isn't as great as other stuff I've made with medium weight jersey fabric. This top was also quite low cut, so after I cut it out I pulled the shoulders up at least an inch, maybe two, which in turn made the top not quite as long.

I wanted to make a dress based on this pattern, but I've run out of time and have to pack up my sewing closet for the move to wisconsin (loading the truck in one week!) so I don't know if it is going to happen. I was going to use this tutorial but with sleeves and a fuller skirt.


Saturday, July 06, 2013

wisconsin

So I guess I never posted this on my blog, but we're moving to Madison Wisconsin at the end of the July. For David's job. Yep. Land of cheese. We will eat it. And enjoy it!

Shirred Maternity Tunic - from a men's shirt

I bought a couple of gigantic men's shirts at the DI a couple months ago, planning to make maternity shirts out of them using tutorials I'd seen on the DIY maternity website. This is the first one. The second one is in progress--and orange! (love orange)

I started out with a 2XL 50-52 size shirt. I tried it on in the store and pretended to have a giant belly just to make sure it would be big enough. I think it was around $5 for the shirt. Then I followed this tutorial. I'd already made a few maternity items by pattern and by guesswork by this point, so I felt brave enough to try this. The very first DIY maternity dress I made is sitting on my sewing table waiting to be "fixed". It does not fit well and needs help. But it got easier after that first debacle. Everything else is wearable if not perfect, and everything has been unpicked a trillion times since I keep sewing things on backward or patterns don't fit quite right. Sigh.

I followed this tutorial pretty much exactly, except I just zigzagged the edge of the sleeves and rolled them up. I wanted the option of cool or warm weather shirt, but this shirt is still sort of warm. Too warm for really hot days. I did add an additional section of shirring on the center of the back since it was too baggy. My only negative comments are that the collar is a little funny and the shirt is super-wrinkly and there is no way I am ironing it! I guess I should have found a wrinkle-free fabric:)

The coolest thing about this shirt was that the elastic thread bobbin I used for the shirring was wound by my grandmother, Ila (who I named my daughter after)! (I have her sewing closet and all the goodies that came with it--thread, buttons, zippers, patterns, presser feet, etc. I love it!) I was digging through the collection of bobbins and there was one already wound with elastic thread. I have no idea when she wound it, but it was at least twenty years ago.

Anyway, here is the final result:


more evidence of domesticity: maternity swimsuit full panel bottoms

I added a side shot on 7/23/2013. See below.

I made just the bottom portion of a suit out of black nylon/lycra (~80/20 blend) with ruched sides (though ruched only on the front piece of fabric) and a clear elastic sown over the gathered edge for stability. (Same idea/method as discussed in this pattern). There is an elastic just below the bustline that keeps it up.  I used this swimsuit tutorial slightly as a guide, but really just ended up tracing existing bottoms that were too small, guessing, basting, trying it on, cutting more, more basting, try on again, etc. It was just trial and error and the fit is not perfect. I used a zig-zag stitch everywhere so it would stretch at the seams.  I initially was planning on just making a fully panel belly band to wear with a tankini top and bottom, but decided to do it this way instead so it was more comfortable and not cutting into my lower belly. 
I am wearing it with the top of a tankini I already had that has slid up my belly. (This picture is from a few weeks ago, with Ila and her friend Madelyn. I can't believe I'm posting a picture of me in a swimsuit! Oh well:)

And here is the side shot:


evidence of domesticity: pack and play fitted sheet

I've had some domestic fever the last few months. I think its just because I'm bored. David teases me that I'm "nesting" but I object. My Stanford job has been diminishing in time commitment over the last 2 years and now it is finally over. (I worked on digital maps while in California, and continued remotely after moving.) I used to just read in my free time, but I suddenly felt like a change.

Really I've been acting completely out of character, sewing maternity clothes, learning to crochet, making a play mat, sheet, etc. There's a lot I haven't posted yet. But I will.

Here is the latest evidence of domesticity that I made just this morning:

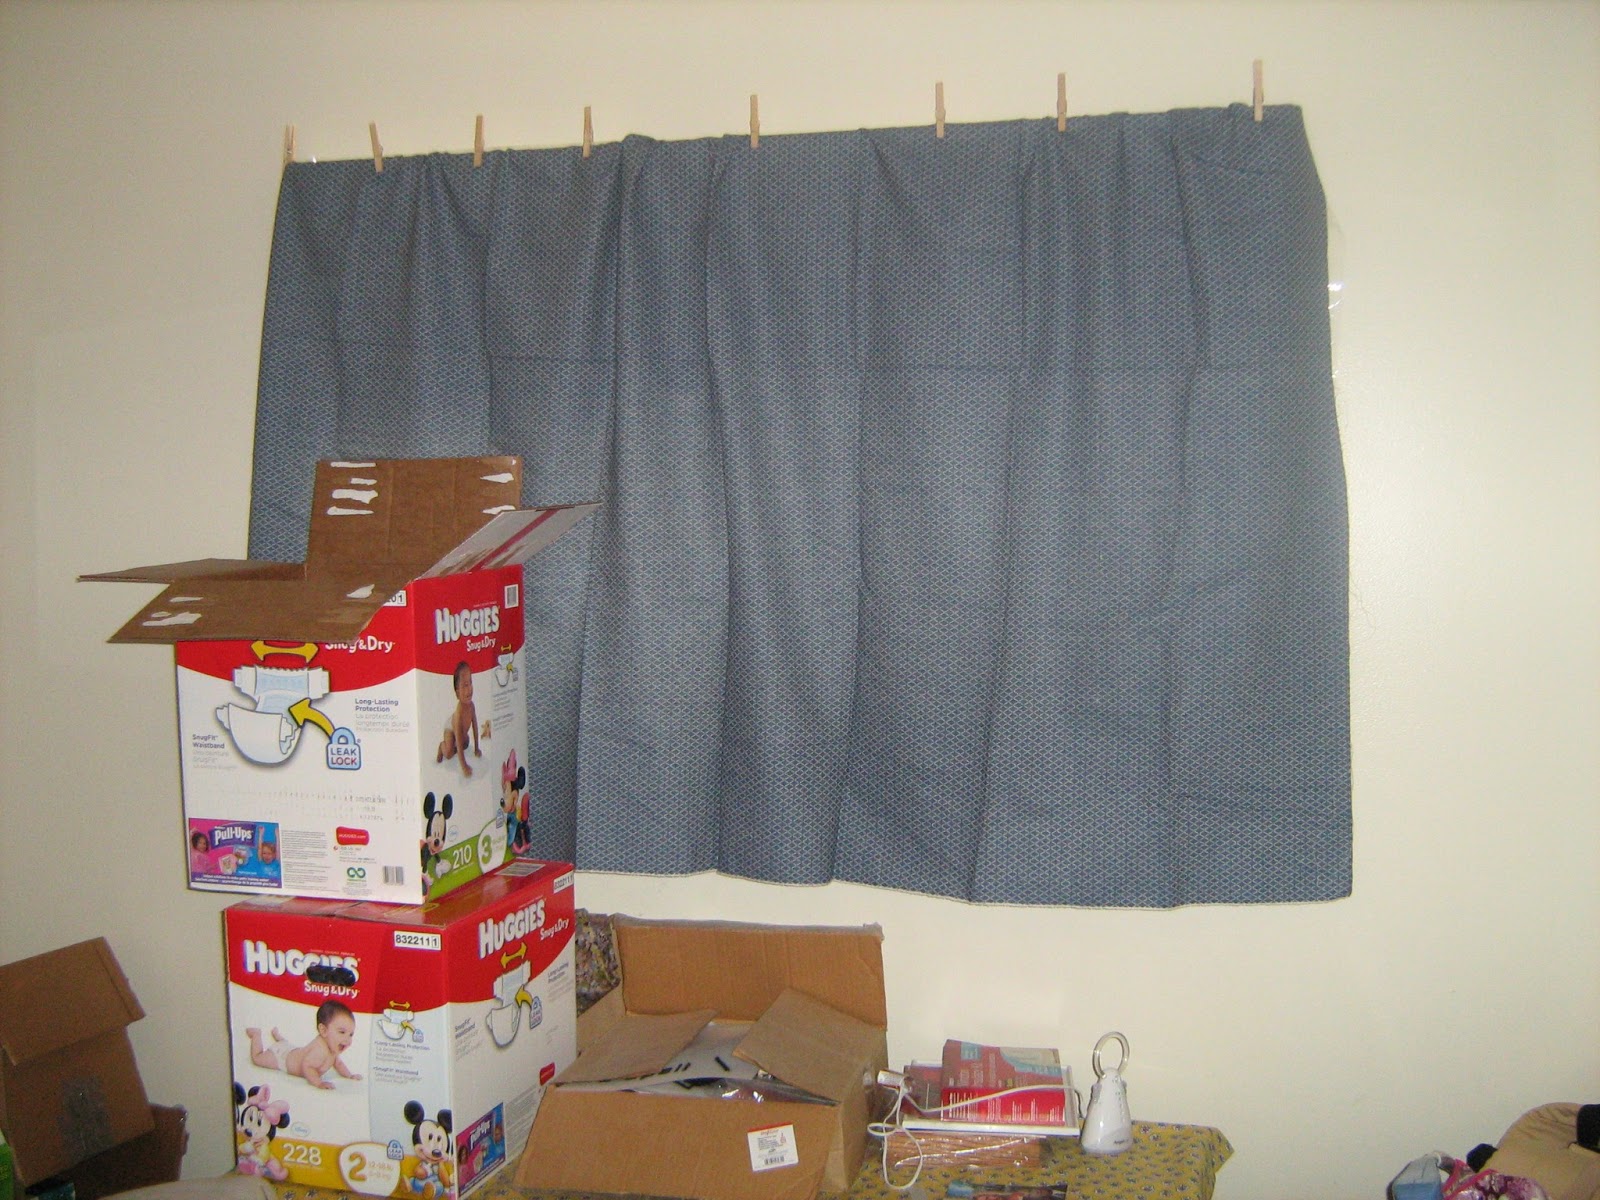
Using some remnant fabric I bought a couple months ago, I made this fitted sheet for Ila's pack and play crib. She's learning to sleep in it since her crib is getting packed in a couple weeks. She's doing just naps for now, and has been doing fine. I put the pack and play in this little closet cubby and she thinks it's the coolest place ever to sleep.

I used this web tutorial: http://prudentbaby.com/2010/02/baby-kid/diy-fitted-sheet-for-pack-n-play-2/
I used only 1/4 inch elastic for it and needed about 62 inches. I cut 3 inch corners (not 3.5 inch) and sewed a 1/2 inch wide channel for the elastic. Other than that I did everything the same. I have a graco pack and play.

The fabric is upside down here, but there are little pink birds on it which I thought were cute.

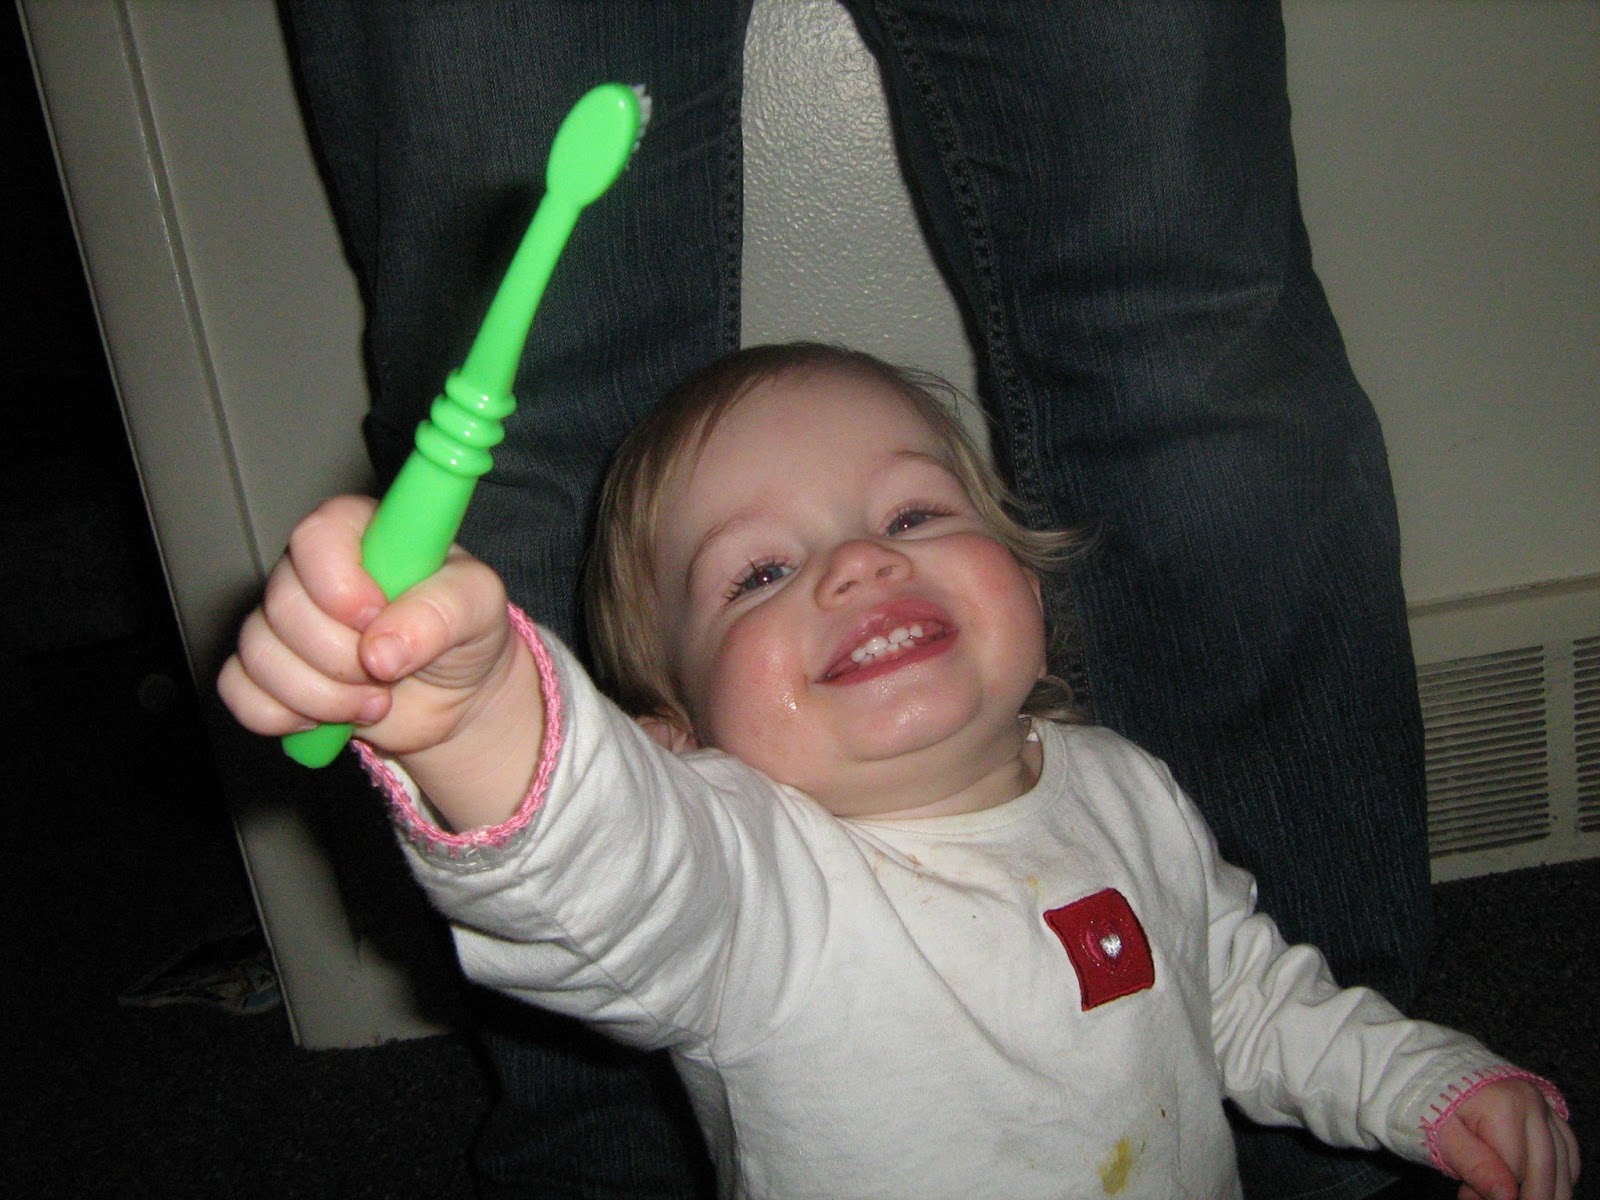
Here's a cute shot of Ila on her new potty seat. She doesn't actually "use" the potty..just likes to sit for now:) 


On the 4th of July this year we went up to a family reunion for part of David's side of the family in the morning, then in the afternoon swam at my parents house. I forgot Ila's all-important pink seahorse (she sleeps with it and takes it everywhere), so asked my sister Heidi to bring the blue one she has so Ila would have something to calm her. Ila apparently does not discriminate with seahorses. She loves them all equally!


David's run

Just so you know, the title of this post was originally "David's rum."  I should have just left it:)

David ran in a 10k on the morning of the 4th of July! Ila and I walked up to the finish line to meet him. This was sort of a practice race for the half marathon he's planning on doing in Wisconsin in August (after the move).

The family shot. Amazingly enough I don't look obviously pregnant here!

And the one where Ila actually smiles...


Friday, June 28, 2013

Twinko de Mayo recap

This year we recorded Twinko de Mayo. Hope you enjoy this video:)


Friday, May 31, 2013

confessions of a gmail-crazed girlfriend

I've decided to confess.

For those of you who know me personally, you know my email address includes my married name. What most of you do not know is that I created that email address before I was married.

Even before I was engaged.

Even a whole year before I was engaged.

Possibly even within the first two weeks of our relationship.

yes.

it is true.

and beyond embarrassing.

In short, I have owned my email address for 6.5 years now, but my 5 year wedding anniversary is next month.

David likes to tell people this. I have refrained.

But now I speak. I have been married nearly 5 years. I have born DH's child. I am pregnant with our second child. I've decided to own up. But 6.5 years ago, gmail was still new enough that some really good email addresses were still available. What if I married DH and then the perfect email was no longer available? I had to create it IMMEDIATELY or face dire consequences. Very dire indeed. You may spend your whole life trying to get an email address without a number in it. And then you get your chance. And you take it.

I know I'm not the only one.

Confess.

Tuesday, May 28, 2013

boy!

We had our ultrasound a while back and found out we're having a little boy! We are excited & nervous at the same time. But luckily we don't have to think of a name now that David's nephew has already given us one.

Introducing... Fire Hydrant! Coming this September. (or October...)


Tuesday, April 02, 2013

more pregernauting

Once again I am the pregernaut: Boldly going where I have gone once before:)

Due September 30.


the end.

Thursday, March 21, 2013

curtains for the noncommittal

So Ila hasn't been napping well in the afternoons for a while now. Sometimes she does, but often she does not nap and just plays even when she's super tired.

My new strategy was to finally put up curtains in her room. I have avoided putting curtains anywhere in the house because we are renting and are living here relatively short term. But today I realized that it is quite possible put up curtains in a noncommittal fashion.

It involves random fabric (that my mom was dejunking last year and I stole) and clothespins. Luckily there was already a curtain rod attached above the windows, making it even easier.

(Do you see that cantilevered table off to the side? It was my *brilliant* use of an old ikea shelfboard that is wedged under the wood bar/changing pad.)


I like it. I think the clothespins are an especially nice touch too. So many boring curtains out there. What's wrong with a fraying edge anyway?  And then when we move, I can just fold them up and put them away and they are not fitted to a specific size window that we may never have again.

This solution may bother many of you who are decorator savvy. Women would often ask me what colors I was going to use in the baby room. My answer--don't know, don't care!  Ila's room currently features a lovely generic blue carpet that is in every other room in the house. And there are the two green matted pictures of gardens on the wall that you can see in the first picture (which used to be in  my room when I was young). And hidden on another wall is a purple flower arch my mom made that also used to be in my room. Also featured is my hope chest with a yellow tablecloth on top, barely visible in the second picture there. And then the rest of the furniture is white. And now I have lavender, denim, and blue/black checkered curtains. If only I had some orange or fuchsia to finish it off.

Ila's bathroom talents

Ila likes to brush her teeth...


And read on the potty:)


Saturday, March 16, 2013

new crafty self

Lately I have had the strangest thing happen to me. I actually wanted to do a craft project. And then DID it! Wow. I may faint in shock at myself.

This is truly remarkable. I have purchased all our christmas stockings, thinking I would never in my life want to make one. When Ila wears her R2D2 winter hat, everyone asks me if I made it. NOT a chance in PROVO! Instead I bought it on etsy. While I am still of the NOT-a-chance variety when it comes to the R2D2 hat, I am now thinking maybe I should decorate the plain christmas stockings I bought someday. But these are side thoughts.

I recently made a blanket for a friend's baby shower gift. (Sam Hall, to be precise:) She is registered at target. My thinking went like this: I don't want to drive all the way to target. I'd rather drive to the fabric store since it's closer and make a blanket. (Let us not discuss how the total sum of time involved is skewed in the direction of fabric store. I did say it was "the strangest thing" after all.)

And here it is! The first blanket I ever made. Using this tutorial and 1 3/4 yard of fleece each side. (which turned out to be pretty big. Another friend made me a blanket just like this, though smaller and more baby size, which I think she must have used 1 yard. I have already purchased more fabric to make this again for another baby shower gift, and got 1 yard this time.)


And there's more. I've been looking into DIY clothing sewing projects. SHOCKING. And I might even try to crochet. (Don't pass out mom.) And maybe I'll even start making that quilt that I have had the fabric for the last 15 years. (Although that is still far out there.)

Maybe this is a phase that I will come out of next week. But maybe it is here to stay. We shall see.

Wednesday, March 06, 2013

song

Sometimes I just get really enamored of a song. My latest is Leon Redbone's My Walkin Stick.

Hope you like it.

So long, and thanks for all the fish.